Home » Plumbing
Category Archives: Plumbing
Becoming a Plumber
Woodlands Plumbing involves the installation and maintenance of pipes, fixtures, and appliances. It also includes the removal of waste water and liquids. It is a skilled trade that requires extensive knowledge and training.

Plumbers collaborate with other professionals, such as construction teams and architects, to ensure that plumbing systems are integrated seamlessly into building projects. They also perform backflow testing, which is a critical part of the plumbing process.
A plumbing system is a network of pipes and fixtures that transports water and waste in residential and commercial buildings. Its main purpose is to provide clean, potable water and remove wastewater in a safe and efficient manner. Its components include water supply piping, fixture traps, drains, sewer pipes, and vents. Plumbers install, repair, and maintain these systems to ensure they work correctly. They also ensure that they comply with local building codes and standards.
Plumbing is a trade that requires extensive knowledge of math, science, and engineering. It also involves understanding how to read blueprints and other technical documents. Plumbers must be able to identify problems and make repairs quickly and efficiently. They also need to be comfortable working around dangerous tools and chemicals.
The first step in installing a plumbing system is preparing the workspace by clearing away obstructions and laying pipe supports. Then, the plumber connects the piping to the water heater and other appliances. The next step is to test the pipes for leaks and proper function. Finally, the plumber seals the joints and connecters, and tests again for leaks.
A faulty plumbing system can result in serious health and safety issues. This is why it is important to hire a licensed plumber for installation and maintenance of pipes and fixtures. A licensed plumber will be able to handle complex tasks and meet strict industry standards. They will also be able to handle emergencies like broken pipes and clogged toilets.
In addition to water piping, a plumbing system includes appliances and fixtures such as sinks, bathtubs, showers, and toilets. These items are connected to the piping through fixture traps and drains, which are designed for specific purposes. The system also includes a drainage system, which moves wastewater through the drains into the sewer system or septic tank.
A plumbing system also contains a venting system, which helps prevent the buildup of sewer gases inside a home. It consists of vent pipes that connect to the drainpipes and extend to the exterior of the house. This venting system is important for preventing the buildup of dangerous fumes and maintaining a healthy environment.
It involves the application of fluid dynamics
The plumbing system is a network of pipes, valves, fittings, and fixtures that transports water and waste in and out of houses and buildings. It is designed to fulfill two primary objectives: supply clean water for use and remove wastewater efficiently. Plumbing systems rely on the principles of fluid mechanics to ensure that they function properly. These principles include the kinetic and gravitational energy-density of the fluid, the effect of pressure on flow rate, and the resistance to flow due to friction.
A basic physics equation known as the fluid continuity equation governs a large part of plumbing. The formula states that a fluid will always flow from an area of higher pressure to an area of lower pressure. This law is harnessed in plumbing by using pumps to create a positive pressure difference between the source and the outlet. It also governs the size of pipes needed to convey a certain amount of water.
In addition, fluid dynamics is used in the design of coastal structures and ocean engineering projects, such as harbors and offshore platforms. The principles of fluid dynamics help engineers understand how waves, tides, and currents affect these structures and predict their stability. This information can be used to design safer and more efficient structures.
Similarly, fluid mechanics is used in the construction of sewage and water treatment plants. Engineers analyze the behavior of fluids and sediments to ensure that they are effective in removing contaminants and ensuring safe drinking water. They also use fluid dynamics to optimize the processes of mixing, settling, and filtration to improve efficiency and quality.
Plumbers must be aware of these principles when connecting house piping systems to public water supply and sewerage systems. Failure to do so may lead to backflow and contaminate the public water supply. Backflow is usually caused by a negative pressure or vacuum in the supply piping.
A plumbing system needs to be well-planned and carefully designed. It must be able to handle the water pressure and flow, which depends on the piping system’s configuration and layout. Moreover, the design must be flexible to accommodate future expansions and upgrades. The design should also consider the sizing and placement of pipes, as well as the layout of fixtures and valves.
It requires a college degree
There are a lot of people out there who think that becoming a plumber requires a four-year degree. They’re wrong. Most plumbers don’t earn their degrees and instead learn the trade through apprenticeship programs or vocational training. Some also enroll in a technical school or community college to get the education they need for their job.
Most states require a license to work as a plumber. You can find these requirements by contacting your local licensing board. In addition to a license, you will need to have the right tools, equipment, and knowledge to do the job. You can find these resources at your local trade school or through online training programs. Some of these courses can be completed in a few months.
It’s important to understand the risks of this profession before you make the decision to become a plumber. Plumbers deal with dangerous chemicals and materials, and they’re exposed to a variety of diseases and infections. For example, plumbers who repair sewage systems may be exposed to human waste, which contains microbes that can cause cholera, typhoid, and other infectious diseases. These microbes can also be transmitted to other workers through the air or via water.
If you want to be a plumber, you need to be physically fit and have good math skills. You should also be willing to do a lot of manual labor. You can start on this career path while you’re in high school by participating in a CTE program or working as an apprentice. Many CTE programs offer connections to plumbing unions and employers, making it easier to find a job after graduation. You can find CTE programs at most schools, including those operated by BOCES.
In New York, you must be at least 18 years old to begin a plumbing apprenticeship. During this time, you’ll earn a paycheck while you’re learning the trade. Generally, apprenticeships last four or five years and include 2,000 hours of classroom instruction and paid on-the-job training. You can also pursue a certificate or associate’s degree in plumbing technology from a trade school or community college.
It is a skilled trade
A skilled trade is a job that requires an in-depth knowledge of a specific area and detailed work. These jobs usually require specialised schooling and on-the-job training. Some skilled trades may also involve working with dangerous chemicals and other materials. These jobs are highly in-demand and provide a high level of financial security for those who choose to pursue them. In addition, they offer the opportunity to be self-employed and have a flexible schedule.
Plumbers are a type of tradesperson who specialises in the installation, repair, and maintenance of plumbing systems. These systems are crucial to our daily lives and allow us to access clean water, dispose of waste effectively, and maintain the health and comfort of occupants.
Plumbing is a complex system that includes pipes, fixtures, appliances, and other devices used to convey fluids. These systems facilitate the distribution of water and gas in residential, commercial, and industrial settings. Besides facilitating the movement of liquids, these systems also help to manage waste disposal and ensure proper drainage. The responsibilities of a plumber include inspecting the plumbing system and ensuring its proper functioning. They also diagnose and repair problems, such as leaks and clogs. They also interpret blueprints and building codes, and collaborate with other professionals to ensure that construction projects are equipped with appropriate plumbing infrastructure.
The work of a plumber can be physically demanding, as they often have to lift heavy objects and squeeze into tight spaces. Additionally, they may have to deal with hazardous materials such as sewage and high-pressure systems. Therefore, they should be prepared to face these challenges and understand the risks involved in their job.
While skilled trades have long been associated with construction and manufacturing, they have grown to encompass a broader range of industries. In fact, these jobs can even lead to entrepreneurship and owning your own company. Today, many people choose to pursue a skilled trade instead of earning a bachelor’s degree, which can be expensive and time-consuming. A skilled trade is a career that allows you to receive professional training at a lower cost and get on-the-job experience. It’s also a great way to save money on tuition fees and living expenses.
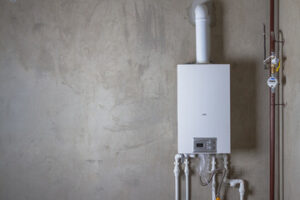
Water Heater Repair – Common Components of a Water Heater
Many homeowners rarely think about their water heater until it starts giving them trouble. A faulty water heater can be frustrating and interrupt your household routines.
However, many problems such as a rumbling noise or lukewarm water can be easily fixed by yourself. However, if you need a professional help, you may contact Water Heater Repair Denver.
A gas water heater thermocouple is an important safety component that detects when the pilot light is still burning. It sends a signal to the gas valve that keeps it closed until the pilot is relit, and this prevents unburned gas from flowing into the water supply. If the thermocouple fails to function properly, it can cause your pilot light to keep going out or even shut off the entire water heater.
Replacing the thermocouple is fairly easy and only requires a few tools. However, there are some essential things to know before you try a DIY thermocouple repair.
First, make sure you have all the necessary tools and equipment on hand to complete this task. You will need a wrench, pliers and a multimeter for testing electrical connections. If you do not have these items, or do not feel comfortable using them, it is best to call a professional to repair your thermocouple.
Once you have all of your tools ready, start by removing the access cover on the burner assembly manifold. This is usually secured by nuts or screws (often specialty tamper-resistant fasteners) and may require a screwdriver to remove. Once the cover is removed, push down slightly on the burner supply tube to free the manifold, pilot tube and thermocouple connections. Gently lift the burner assembly out of the combustion chamber and set it aside.
You will need to disconnect the thermocouple from its connector on the gas valve with an open-end wrench. At this point, you can also remove the gas valve’s pilot tube connection nut if it is loose. This will allow you to disconnect the copper tube that connects the pilot flame to the thermocouple, and then use your multimeter to test for a voltage reading. A reading of less than 20 mV will indicate that your thermocouple is failing and needs to be replaced.
Once you have disconnected the thermocouple from its connector, take it to a hardware store or home center for a replacement. Be sure to match the type of thermocouple you purchase to the model number of your water heater.
Element
Water heater elements, like other electric components in the unit, can burn out over time. Symptoms of a burning out element include cold or lukewarm showers and a circuit breaker repeatedly tripping. Other symptoms may include an unusual smell or discoloration in the water. Regardless of the cause, the problem is likely to lead to the need for repair or replacement of the heating element.
Replacing a water heater element is relatively simple for those with the proper know-how and tools. However, if you lack the tools and experience necessary for this task, it is recommended that you contact a professional to avoid potential danger.
The first step is to shut off the power supply to the heater by closing the circuit breaker. You will also need to drain the tank if it contains any water. This can be done by connecting a garden hose to the drain valve located at the bottom of the tank and directing it into a drain or outside. Open a hot water faucet somewhere in the house to relieve pressure from the tank while it is draining.
Once the tank is drained, you can access the element by loosening and disconnecting the electrical wires attached to it. Before you do, it is important to use a non-contact voltage tester to confirm that there is no electrical current flowing to the element. Then, remove the element by turning it counterclockwise with a socket wrench.
Before you install the new element, make sure that it has the correct voltage and wattage rating for your water heater. You can find this information on the flange or terminal block of the element and on the water heater’s data plate. Clean the area of the tank where the gasket fastens to it by using a rag. Then, position the new gasket on the element and insert it into the tank opening. If you have a screw-in-type element, thread it clockwise into the tank opening with a socket wrench until secure. If you have a flange-type element, screw it into place using the four mounting screws.
Dip Tube
The dip tube directs cold water into the bottom of a gas or electric hot water heater tank so it can be heated by the gas burner or primary electric heating element. Having a working dip tube is critical to your home’s hot water supply. If the dip tube breaks or becomes clogged with sediment, your water may become discolored and lukewarm. It’s a common cause of water heater problems and one that is easy to fix.
The Dip Tube’s Job
As its name implies, the dip tube “dips” into the cold water inlet port of your hot water tank to suppress 8 inches of incoming cold water down to the bottom where it is heated by the gas or electric heating elements. As the water heats, it rises back to the top of the tank where it is ready for immediate use. The dip tube is most often seen in gas water heaters, but it can be found in some electric models as well.
In general, a dip tube lasts as long as a water heater, but like anything in your house, it can get rusty or even break. The constant push and pull of water moving up and down through the pipe erodes it, especially if there’s a lot of sediment in the water. Constant exposure to water can also eat away at the plastic of the dip tube.
A deteriorating dip tube is the most common reason for sudden loss of hot water. It’s not always a big problem to replace the dip tube, but you should do so carefully. First, shut off the power to the water heater by turning off its circuit breaker. Then, disconnect the cold water inlet pipe from the tank by unscrewing the nipple for the pipe connector and the pipe nipple on the tank’s inlet port with a wrench. Then, remove the old dip tube and replace it with a new one that’s a few inches longer than the existing one.
A good replacement is a standard flanged PEX dip tube, but you can upgrade to one that’s made of a more resistant material such as crosslinked polyethylene (PEX). Once you’ve replaced the dip tube, reconnect it by replacing the pipe nipple and the connector on the cold water inlet port. Reconnect the water supply line to the tank and turn on the power at the circuit breaker.
Pressure Valve
The pressure valve is one of the most important components in a water heater. It’s responsible for releasing excess water or gas to prevent overheating, tank damage, and even explosions in some cases. Unfortunately, these devices are often ignored by homeowners and can become faulty over time. In order to keep them functioning properly, homeowners should regularly test their pressure valves and perform regular maintenance and inspections.
The water pressure valve is located on top or side of the tank and includes a discharge tube that extends down and away from the heater. To test the valve, shut off your water supply and power, then position a bucket under the discharge tube. Carefully pull the metal lever on the valve open until a small amount of water-about a quarter cup-discharges into the bucket. Then release the lever so it snaps back into its original position. If it doesn’t snap back quickly, then your valve isn’t working as it should.
If you’re experiencing problems with your water heater, contact a professional for help. They can inspect your water heater and help you determine whether the pressure valve is causing your issues.
A faulty relief valve isn’t just dangerous, but it can also lead to flooding in your home. It’s essential to check it regularly for any signs of wear and tear, and to have it repaired or replaced as soon as possible.
As water or gas is released from the system, the internal pressure falls and the spring force closes the valve. This prevents the pressure inside the vessel or system from rising to unsafe levels, which could cause it to “burst” and flood your garage or closet.
While you can do some maintenance and testing on your own, it’s best to have a professional take a look at the entire unit, especially if there are other issues like low energy bills or low water pressure. A professional will be able to diagnose the problem, and can usually fix it right away. In many cases, it will just be a matter of adjusting the blowdown setting or replacing the valve.